Showing posts with label makeup. Show all posts

It's In The Bag


I wanna share a little bit of my "beauty routine" today, since I recently picking up this adorable cat-eared leopard makeup bag (for only five dollars, thanks uo sale!) In addition to various lip balms, it's usually filled with these basics on a daily basis:


Tarte inner rim brightener I'm always on the hunt for new products when it comes to brightening tired eyes. Since mine are perpetually red-rimmed and/or accompanied by dark circles, I like to carry this eyeliner with me to perk up my gaze mid-afternoon. The beige hue and creamy formula is a more natural option than chalk white, though a little harder to find.

Love + Toast clementine crush roll-on scent I discovered this perfume a few months ago and am really digging the refreshing scent. As if clementines couldn't smell any better, the blend dries down to a vanilla sugar finish with notes of guava, mandarin, and ripened mango. With summer rolling  around, I'll definitely be using this as a quick pick-me-up on hot afternoons. Plus, Love + Toast never tests on animals and a portion of every sale goes directly to Regional Affiliates of Girls Inc., an organization inspiring young girls to be smart, strong, and bold!

bareMinerals mineral veil & moisturizer I'm a pretty big bareMinerals freak; I blame it all on going to college in a town with Sephora. One demonstration of the foundation and I was hooked, but I won't go into that now. I splurged on the special addition gold dust mineral veil set last Christmas, which I carry around for t-zone touch-ups. I also like to tote around a trial-size of the moisturizer for combination skin in case I get a case of the flakies around my nose or I want to add some dewiness to my cheeks.

Burt's Bee's apricot oil I often have dry cuticles and hair, so I carry a teeny bottle of apricot oil in my kit. A drop or two rubbed between your palms tames frizz and adds shine to rough ends, or soothes hangnails and dry knees and feet.


What are your daily essentials?
Louis Louis: a sort-of makeup diy

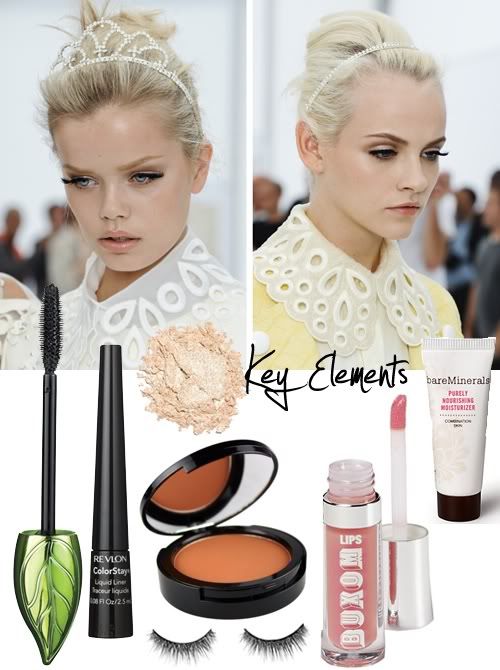
I was riveted by the makeup in Louis Vuitton's Spring/Summer 2012 runway presentation, done by Pat McGrath, I believe. The defined eye touches back to fifties and sixties style while the luminous foundation and glossy lip help update it for today. I tried to recreate the look using products I already had.

moisturizer
My cheeks and eye area tend to get a little flaky, so I was immediately drawn to this awesome makeup trick I read in an old Alexa Chung interview: after your finish your face makeup, rub a little dab of lotion between your palms and lay them on the areas of your face that look chalky for a few seconds. This will help give your skin back a dewy, natural appearance after you've evened it out with makeup (if you use it at all). Right now, I'm really liking my Bare Minerals Purely Nourishing moisturizer sample, enough so that I ordered another one (sample).

bronzer
I only recently learned the secret behind that illusive, natural-looking peachy/taupe eyeshadow I keep seeing: try bronzer! It looks more "natural" against your skin than chocolate brown hues. I used the Warmth bronzer from BareMinerals..

black liquid liner
Quintessential. I like Revlon ColorStay because the applicator is like a fine felt tip pen and easy to control. I get the stuff everywhere if I use one with a long skinny brush.

lush lashes
Either pull out some fakes, or use gobs of black mascara. I am liking the fatty brush and "natural" claims of Physician's Formula Organic Wear mascara at this moment.

peachy lipcolor
Lips look natural and low-in this look. I pulled out an old tube of Sandy (a nude/apricot lipgloss) from BareMinerals Buxom line. If you don't have any peachy lipcolors, just use clear lipbalm.


Step by step:
♥ Skin:
Even out your skin like you normally would. Make sure to define/groom your brows and avoid bright blush. Lightly press moisturized palms onto your cheekbones, brow-bones, and the tip of your nose. This will add a dewy finish to the areas that reflect the most light.

♥ Eyes:
As a base, apply a beige shadow to your lid and brow area. Concentrate some shadow on the brow-bone and inner corners of the eye to highlight. Lightly sweep bronzer along the crease of your eye and under the bottom lashes. Concentrate the color in your natural crease, adding shadow gradually and blending well. No hard edges!
Next, draw a bold line along your upper lashes with liquid liner, extending a little flick beyond the corners; let it dry before moving on! Dot a sharpened black eyeliner pencil between your upper lashes and line the inner rims (I'm just weird about skin showing through gaps in eyeliner liner)). If you have white or beige eyeliner, put a touch along your lower rims for an even more wide eyed, clean look.

♥ Lashes:
Now either apply falsies, or brush a ton of black mascara onto your upper lashes. Wipe the excess off the brush before using the tip of the wand to darken the lower lashes on the outer two-thirds of the eye.

♥ Lips:
Swipe on some lip gloss, and you're peachy keen!


In retrospect, I could have gone way more gonzo with the liner 'n lashes...

But besides that, whaddya think?

Makeup Madness

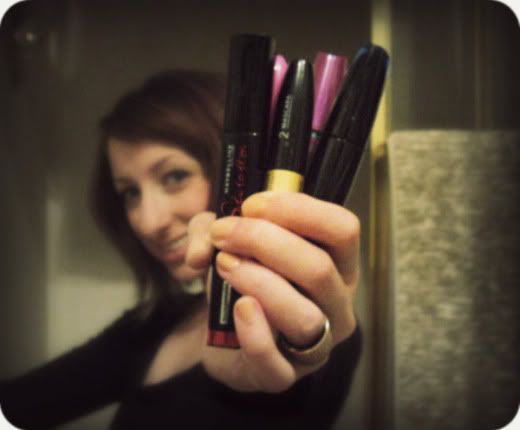
Soo... I've tried five drugstore mascaras in the past month, and thought I'd share with you some of my findings.
Especially because it's insane that I bought that many, I need to at least blog about it so it's not a complete waste ;]

(from left to right: Maybelline Lash Stiletto; Rimmel The Max VolumeFlash; Revlon Lash Fantasy;
Maybelline The Falsies Volum'Express; L'Oreal Extra Volume Collage)


 Mascara Reviews: