
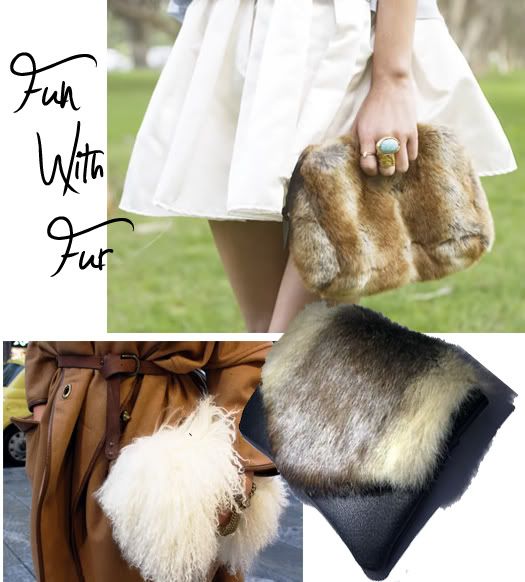
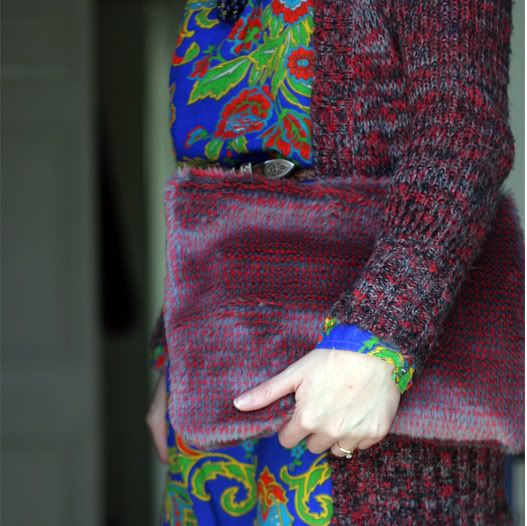
I've been seeing luxurious furs adorning the necks of street style stars for years, but lately even their clutches are gloriously fuzzy! Here's a tutorial to make your own simple zippered faux fur clutch, which I've discovered can also double as a pillow or lap warmer. Change the measurements and your iPad could have a jazzy fur coat, too!
My version:
Materials:
1/3 yard faux fur*
12" zipper
*Materials: You only need about 1/4 to 3/8 yard fabric for the clutch. The length cut will form the height of the clutch. Faux fur comes in many price ranges; super-soft, realistic stuff (it's called Minky) can get up to $40 a yard, while more unnatural looking (and feeling) faux furs are often sold on remnant tables for less than $10 a yard. It's also possible to find faux fur vests or other clothing items you can cut up at the thrift store or flea market. Most fabric and craft stores sell zippers in dozens of sizes and colors for less than $4. An even more eco-friendly and affordable option would be to remove the zipper from an old piece of clothing.
Also, you'll need to find the zipper foot attachment for your sewing machine. The regular presser foot won't allow you to sew closely enough alongside the zipper.
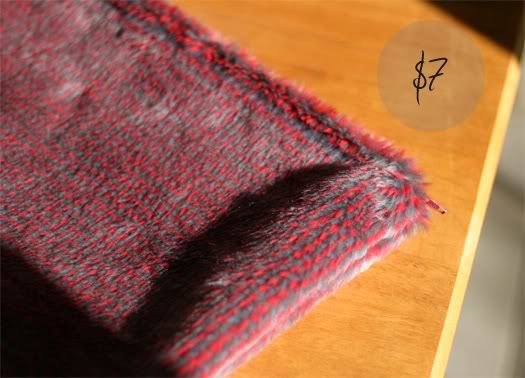
What I Did: I bought a burgundy 12" zipper and bought 1/3 yard of grey and red faux fur from the remnant tables at Beverly's Fabrics.
1/3 yard faux fur*
12" zipper
*Materials: You only need about 1/4 to 3/8 yard fabric for the clutch. The length cut will form the height of the clutch. Faux fur comes in many price ranges; super-soft, realistic stuff (it's called Minky) can get up to $40 a yard, while more unnatural looking (and feeling) faux furs are often sold on remnant tables for less than $10 a yard. It's also possible to find faux fur vests or other clothing items you can cut up at the thrift store or flea market. Most fabric and craft stores sell zippers in dozens of sizes and colors for less than $4. An even more eco-friendly and affordable option would be to remove the zipper from an old piece of clothing.
Also, you'll need to find the zipper foot attachment for your sewing machine. The regular presser foot won't allow you to sew closely enough alongside the zipper.
What I Did: I bought a burgundy 12" zipper and bought 1/3 yard of grey and red faux fur from the remnant tables at Beverly's Fabrics.
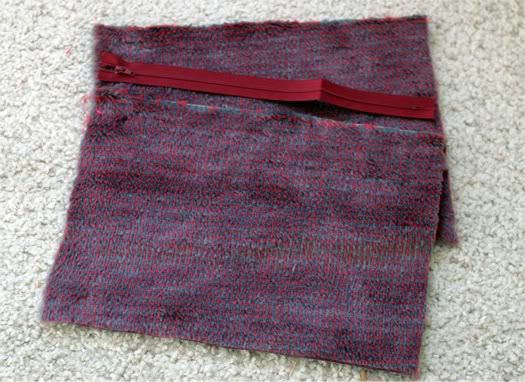
Step 1: Cutting
Cut two rectangles out of your fur. The width should be about the length of the zipper, plus a few inches for seams. The height will determine how tall the bag is. To keep it proportional looking, make sure the clutch is wider than it is tall, but not too skinny and long.
What I Did: Since I used a 12" zipper, I cut two pieces of fabric that were 14" wide and 10" tall.
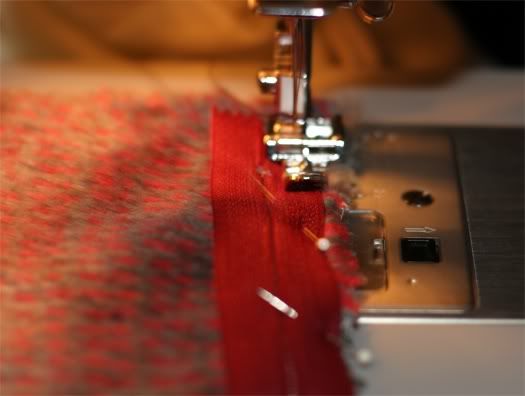 Step 2: The Zipper
Pin the zipper front side down to the top edge of one furry piece. To get past the zipper pull at the top, unzip the zipper a few inches before starting your stitch. Once you've sewn a few inches, zip the zipper back up before you continue sewing. Repeat with the other piece of fabric, making sure to line up the edges of the fabric as evenly as you can. Now you should have two rectangles of fabric joined by a zipper, and you're almost done!
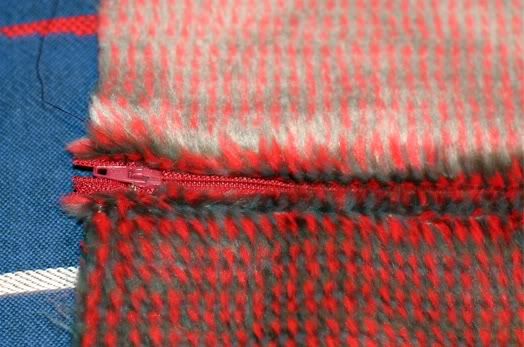
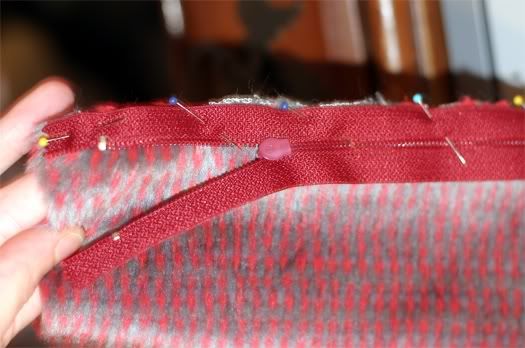
Step 3: Finishing
Pin the right sides of the fabric together, edges aligned and the zipper straight and even. Before you actually sew your bag shut, it's VERY important to open the zipper up at least a few inches, so you can turn the bag inside out later. Make sure to sew carefully through the zipper ends as well. Turn your bag inside out, make sure the zipper works, and if you want, use a pin to pull out the fur caught in the seams...
Voila!
Happy Sewing!
No comments:
Post a Comment
Thank you for visiting my blog! I appreciate every comment and will try to reply to any questions.
I hope you're having a wonderful day or night :)