
What You'll Need:
• scissors
• safety pin
• sewing machine or needle + thread
• 1 1/4" wide elastic*
• 3/4 to 1 1/2 yards fabric, pre-washed**
• sewing machine or needle + thread
• 1 1/4" wide elastic*
• 3/4 to 1 1/2 yards fabric, pre-washed**
*You'll want to get enough elastic to stretch comfortably around your waist. The easiest way to determine the amount is to measure your waist, subtract a few inches from that number, and voila. You may use a slimmer elastic if you prefer a slimmer waistband.
** The amount, or length, of fabric you buy will determine the length of the skirt. I bought 36" inches (or one yard) in order to make a long skirt for my short self. If you want to make a longer or shorter skirt, measure from your waist to the desired length, add four inches for hemming safety, and get that amount. I made sure to choose a wide fabric so my skirt would be very gathered and full; this piece was 60 inches wide. Beware of fabrics with a width of 45 inches—unless you're child-size, that's not going to make a very fun skirt using this tutorial ;]
Where To Shop?
As to where to get your fabric, I am a big fan of the remnant tables in most fabric stores. This is where factory ends go, which means sometimes you can find a fabulous print or texture for much less. I used a medium-weight jersey for this skirt, but you could use almost anything: knit, cotton, linen, flannel, etc. You could also use vintage tablecloths, or sew a bunch of thrifted scarves together, or recycle an old muumuu...
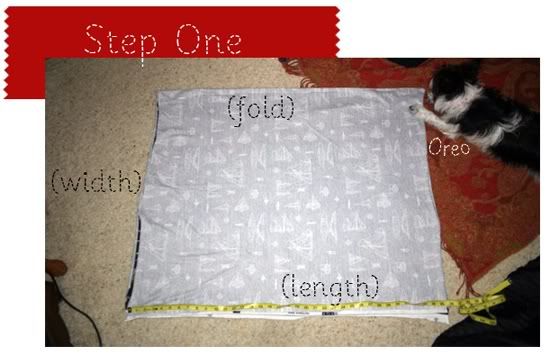 Step One: Lay It Out!
As you can see from the photo, Oreo wanted to help while I lay out my fabric. This is to make sure the edges are straight; trim off any crooked spots.
Making sure the pretty sides of the fabric are facing each other (like in the photo), sew a straight seam down the length of the fabric, creating a wide tube. This seam will be the center back seam of your skirt.
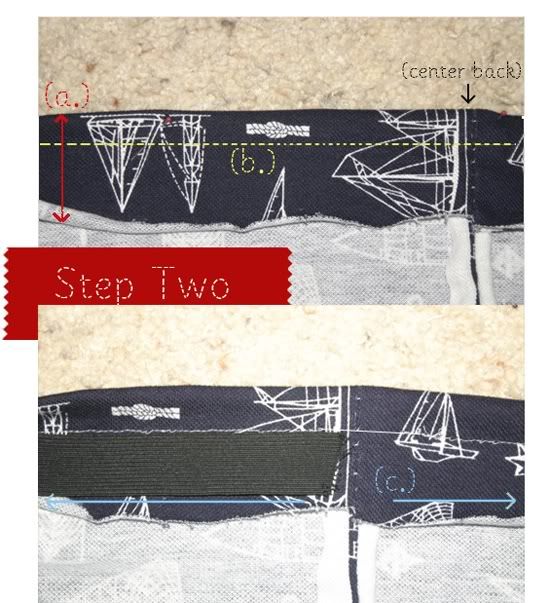
Step Two: Making the Waistband/Elastic Casing
(a.) Next, determine which edge will form the top of the skirt. Fold over the edge by two inches and iron or pin. This will become the casing for your elastic. If you are using a skinnier elastic, you don't need to fold down quite as much.
(a.) Next, determine which edge will form the top of the skirt. Fold over the edge by two inches and iron or pin. This will become the casing for your elastic. If you are using a skinnier elastic, you don't need to fold down quite as much.
(b.) Sew a straight stitch along the indicated line, using your presser foot as a guide.
(c.) Line your elastic up to determine the necessary width of the casing. Sew, making sure to leave a few inches open at the center back so you can thread the elastic through.
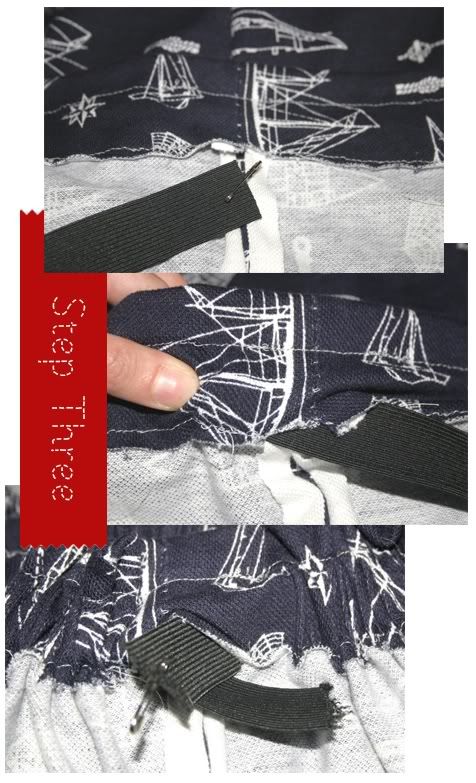
Step Three: Inserting the Elastic
Attach a safety pin to one end of your elastic. This will provide you with something to hold on to as you snake the elastic through the casing. After you have the elastic pulled all the way through, sew the ends together. You'll probably want to run the machine back a forth a few times to make a strong seam. Once the ends are joined you can let the loop of elastic disappear into the casing. Sewing shut that small space is an optional step I'm often too lazy for ;]
Attach a safety pin to one end of your elastic. This will provide you with something to hold on to as you snake the elastic through the casing. After you have the elastic pulled all the way through, sew the ends together. You'll probably want to run the machine back a forth a few times to make a strong seam. Once the ends are joined you can let the loop of elastic disappear into the casing. Sewing shut that small space is an optional step I'm often too lazy for ;]
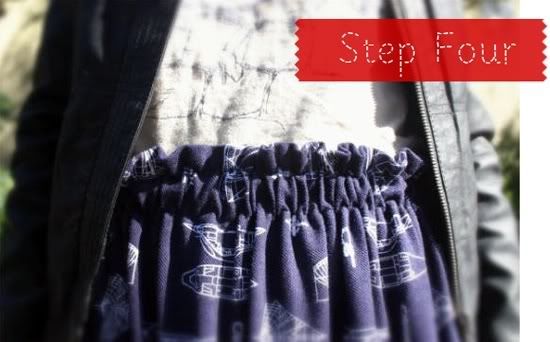
Step Four: Finishing Touches
Now you can try on your skirt! Check the fit of the waistband; if it is too loose, pull the ends back out and adjust. Check the length; if you'd like to shorten your skirt, cut off the desired amount, and/or just fold over and hem the skirt as is.
Now you can try on your skirt! Check the fit of the waistband; if it is too loose, pull the ends back out and adjust. Check the length; if you'd like to shorten your skirt, cut off the desired amount, and/or just fold over and hem the skirt as is.
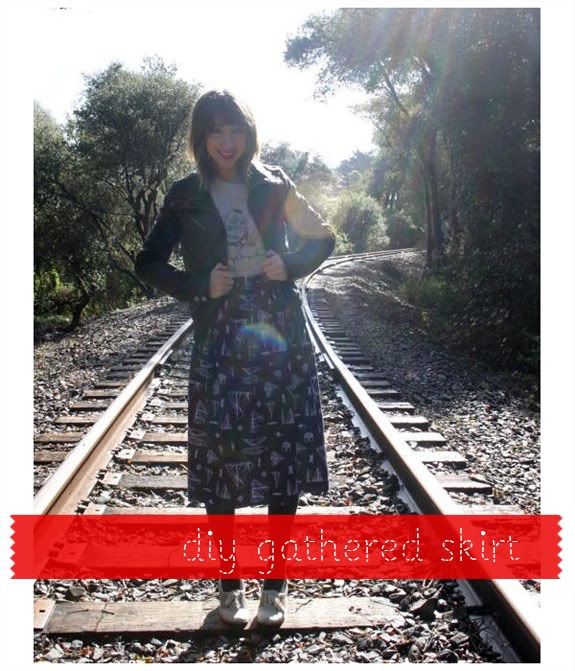
Well there you gals go, I hope you enjoy making some new skirts for Spring! Let
me know if you have questions and I'll try to answer them shortly in the comments.
If you'd like to check out some of my other sewing projects, go here :)
Great tutorial :)
ReplyDeleteGreat tutorial and seems so easy! Lately I've experimenting with my sewing machine and my dreams is to be able to make my own clothes someday. i think I could start with this simple project! :-)
ReplyDeleteThanks for sharing!
Love the skirt! I'm bookmarking this for when I'm back home with the family sewing machine! :)
ReplyDeletestar-crossed smile
That looks so easy. Now if I only could get my sewing machine to work!
ReplyDeleteThis tutorial is definitely one of the easiest I've seen. Great job and thank you for sharing! I love the gathering effect on the top part. It reminds me of those "paper bag" shorts/trousers. Such a cool effect! Come visit sometime! ;)
ReplyDelete♥ Teresa ♥
- Pretty Dandy -
I am sad that I didn't get to see you! Plans got hectic- we ended up leaving a night earlier than expected and I am such an old woman (I went to bed at like 11). Next time, I promise! I will be going down there before I leave for Michigan so hopefully we can make this happen. Are you coming up here soon? And this is a sweet tutorial for a skirt. I am so going to try this at home!!
ReplyDeleteThis is awesome! I actually did it! It only cost me $15 for all the supplies and took me only 2 hours ( I hadn't sewn anything in a long time). Thank you so much!
ReplyDelete