
What better way to spend the last of these dreary days before spring rolls around? Sewing a diy skirt to wear when the weather changes (or over two pairs of tights!) Being stuck inside isn't so bad if you've got a sewing machine and access to a fabric store. Pick a fun, exciting print to cheer up these grey days! In true diy fashion, an old dress or full skirt can be a good source of material too. This is a basic tutorial showing how I make my favorite skirts:

What you'll need:
- 1/2 to 1 yard fabric, pre-shrunk and preferably ironed
- 2/3+ yard 1
- scissors, sewing machine, thread
I chose a cotton fabric with a bright poppy print. This fabric is 45" wide, which will be the width of the skirt. A wider fabric will result in a fuller skirt. If you'd like a longer skirt, measure from your waistline to the desired length, add 3" and buy that amount of fabric. The length of the skirt is determined by the amount of fabric you buy. I am 5'2" and used a half yard of fabric, which is 18" long (by 45" wide). Remember to account for seams and fabric shrinkage; don't cut it too close. Using t-shirt knit or jersey fabric will give a softer, looser, more clingy skirt.
- 1/2 to 1 yard fabric, pre-shrunk and preferably ironed
- 2/3+ yard 1
½" to 3" wide elastic- scissors, sewing machine, thread
I chose a cotton fabric with a bright poppy print. This fabric is 45" wide, which will be the width of the skirt. A wider fabric will result in a fuller skirt. If you'd like a longer skirt, measure from your waistline to the desired length, add 3" and buy that amount of fabric. The length of the skirt is determined by the amount of fabric you buy. I am 5'2" and used a half yard of fabric, which is 18" long (by 45" wide). Remember to account for seams and fabric shrinkage; don't cut it too close. Using t-shirt knit or jersey fabric will give a softer, looser, more clingy skirt.
The elastic gathers the fabric and serves as the waistband. Measure around the smallest part of your waist, subtract 1" and buy that amount of wide elastic. Some stores have colored elastic, or at least white, which works better with light fabrics. A wider elastic will look more dramatic, and could be a lot tighter, almost like Spanx or a wide corset belt. I used 1
½" elastic because I like to eat and breathe a lot ;]Step One:
Fold the fabric so that the shorter ends (the length of the skirt) are matched up and the front, or "right," sides of the fabric are touching each other. Pin if needed, and sew. This will create a tube, which will shortly become your skirt!
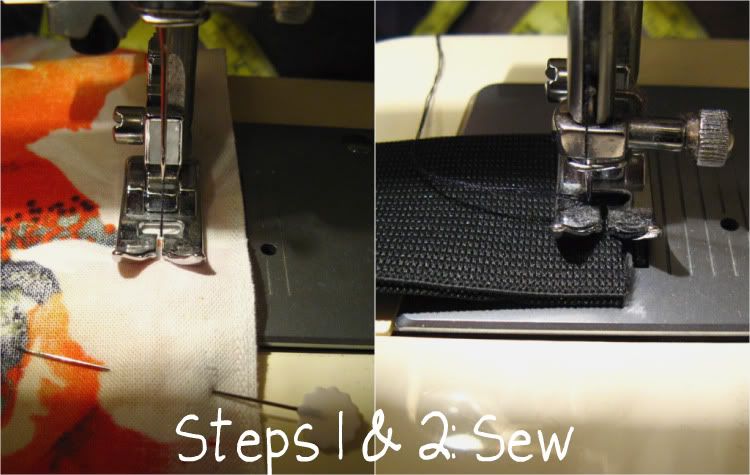 Step Two:
Sew the ends of the elastic together and sew. I like to go over it several times with a zig-zag stitch across the edges for reinforcement, since this seam will be stressed a lot.
After you have those steps done, you're almost ready to put the two pieces together! Get some pins handy. Stretch the elastic out a few times to loosen it up and get it ready to join with the skirt.
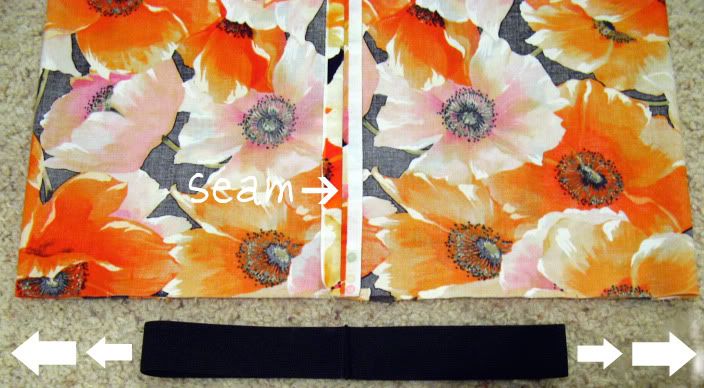
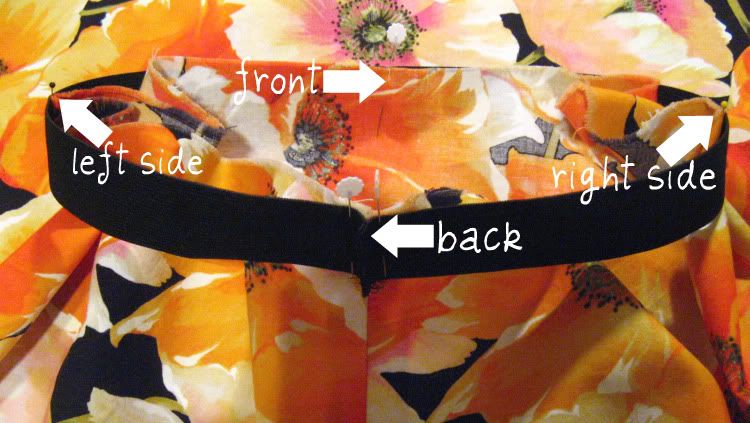
Later, the elastic will be stretched as you're sewing it to the skirt waist. Doing this will create the gathering at the top. It sounds scary, but don't worry. It'll be a snap! Lay the fabric out as shown, the fabric lying flat and even and the seam you've made is in the middle. This will be the back of the skirt.
Step Three:
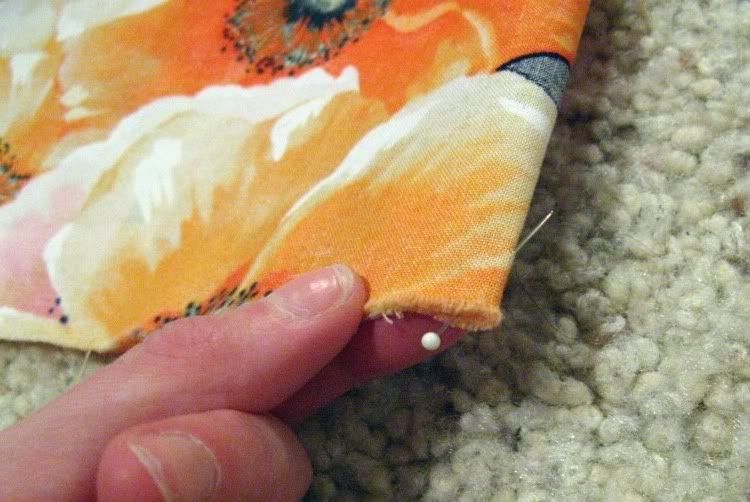
Start by pinning/marking off the point directly opposite your middle seam. This will be the front of the skirt.
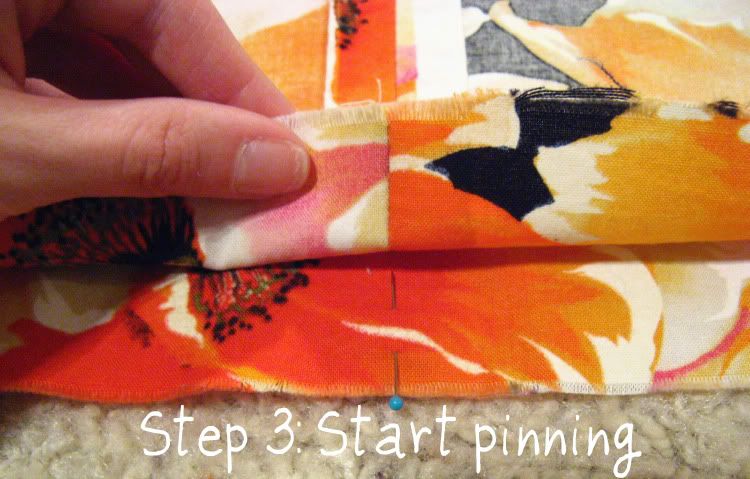
Mark/pin the outermost points as well (the left and right sides of the skirt). If you made two side seams instead, you'll only need to mark the front and back points.
Do the same thing to the piece of elastic, marking off the front, back and sides.You will use these points to match up the elastic and skirt pieces.
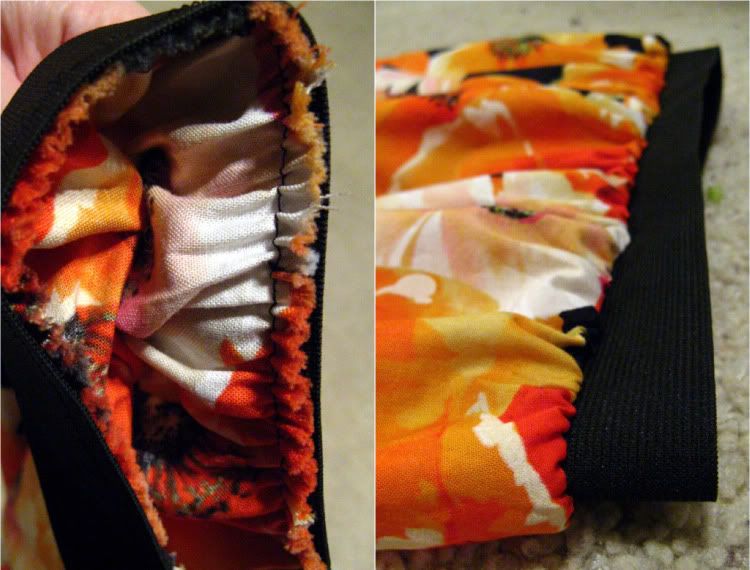
Pin the right side of the skirt fabric (shown facing outward in the picture above) to the elastic (shown facing inward). In other words, make sure you are pinning the front side of the fabric to the smooth, un-seamed side of the elastic!
Step Four:
Start sewing. After you anchor the thread with a good back-stitch, stop and grasp the elastic by two parts: one behind the machine and one in front. You are going to pull the elastic taught to its limit, and then sew it in this position to the fabric beneath it. You'll have to work in short sections in order to stretch the elastic to the fullest extent while moving it along with the machine.

Pat yourself on the back! The hardest part is over.
Step Five:
Now it's time for the first fitting. Try on your skirt! Figure out how long you'd like it to be, and mark or measure where you want to hem it to. I like to iron cotton to give the bottom of the skirt a cleaner look and make the hem easier to sew.
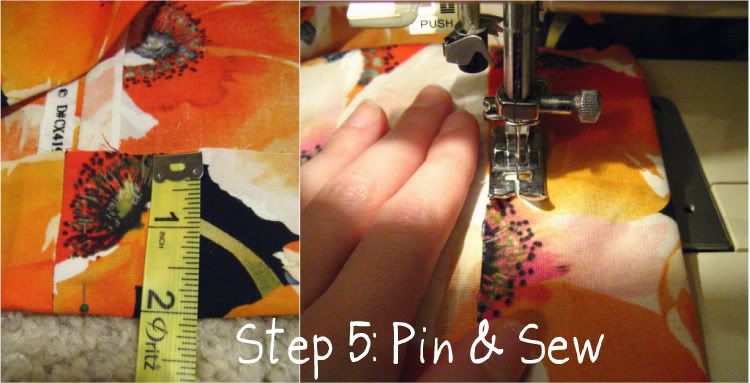
I ended up cutting two inches off, and then folding two inches under for a wide hem. You could also do a double fold for a more finished hem: instead of a single 2" fold, turn one inch under, press, then fold over again, press and sew.
Here is my finished skirt:

Time: 45 minutes
Materials: $7
Voila! Make yourself a one-of-a-kind skirt to spring you from those winter doldrums ♥
You're too brilliant!! I'd probably sew my fingers to the skirt if I attempted this.
ReplyDeleteLove this tutorial it's so so simple! I had my first sewing machine for christmas and am currently working on a vintage playsuit pattern, maybe this simple skirt would have been a better first project! lol!
ReplyDeleteYou make it look so easy!!! great job!
ReplyDelete